
How To Paint
Learn How To Paint With This Guide
You’ve psyched yourself up to paint your walls a new color. You’ve found the perfect shade of turquoise (okay, maybe beige). You had the paint mixed at your local store, and you are now ready to get started transforming your room.But where do you start? If you’ve never painted a room before, the thought can be a bit overwhelming.Browse Paint Colors

Step 1: Move the Furniture
Begin by moving the furniture you can move out of the room. Yes, you could just push it all to the center of the room, but removing it actually gives you the space to work on the top sections of the walls. You will be using a ladder and a tall roller pole to reach up high on your walls, and maybe your ceiling, and your mood will be greatly improved if you aren’t constantly bumping into your sofa. You’ll also want to remove any artwork or shelving that you have hanging on the walls.

Step 2: Cut the Power
Next, you should turn off the power to the room (by flipping the correct breaker in the breaker box) and remove your outlet and light switch covers. You’ll be able to simply unscrew the covers with a small screwdriver. This is such a quick task—there’s no reason to have paint-splattered outlet covers! If you will be painting your ceiling, go ahead and take your overhead light fixture or fan off the ceiling.

Step 3: Damage Repair
Do you have any cracks or holes that need to be repaired? Are there any nail holes that need to be filled? Do you need to wash or dust your walls? Now is the time to address those issues.
Step 4: Tape Off
The next step is everyone's least favorite in all of painting — tape off your trim and cover your flooring. In order to keep your trim work and flooring paint-free, you’ll need to use painter’s tape to mask those areas. Use canvas drop cloths to cover your flooring, and either plastic or canvas drop cloths to cover any furniture that did not get removed from the room.Buy Paint At The Home Depot
Step 5: Prime Walls and Ceiling
Now you can prime the walls and ceiling, if you are so inclined. With the advent of paint primer products, priming isn’t always necessary. If you are drastically changing paint colors (like going from dark to light) or painting over a graphic design (like stripes or chevrons) you’ll want to prime separately. Otherwise, go ahead and use the paint primer products.If you are painting your ceiling, always do that before you move on to your walls. When you are rolling paint over your head, there is an opportunity for splatter. You don’t want to splatter on your freshly-painted walls! You’ll also want to wear a baseball cap and safety goggles to keep paint out of your eyes and hair.

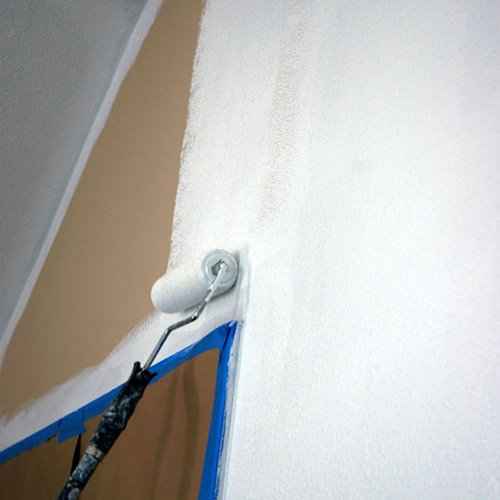
Step 6: Apply Paint
With priming and painting, there are two different ways you can paint your walls. You can cut in and then roll your wall, or you could do it vice versa. Cut in where the walls meet the ceiling, in the corners, and along the tape line covering the trim. Once that is dry, attach a paint roller to an extension pole and roll the rest of the walls. Try to roll walls in a W pattern, to ensure even coverage and limit roller lap marks. Plan on doing two coats of paint, and you won’t be disappointed.Buy Paint At The Home Depot
Step 7: Check Your Walls
After you have applied your two coats, don’t put your paint cans away just yet. Look closely at your room over the next few hours in the changing light and mark any areas that need touch up with a small piece of painter’s tape. Touching up paint is a way of life for the DIYer, and you just need to be prepared to go back and fix a paint drip or repaint a portion of a highly-textured wall.If you are repainting your trim, go ahead and re-tape it once your walls are dry. Instead of taping like you did for the walls, you will now put a strip of tape on your wall where it meets the trim. Wipe down your trim to remove any dirt, cover your floors, and paint the trim.Now that the painting is done, you get to enjoy your refreshed room — and if you’re redecorating, you can move on to the furniture and accessories. Congratulations!Buy Paint At The Home DepotAs always, safety first! Please refer to the Product Label, Technical Data Sheet (TDS) or Safety Data Sheet (SDS) for safety and detailed application instructions.